
Baking is now more fun! Add whipped texture to your baked goods, like chocolate cream or berry
sauce, for a delicious twist.
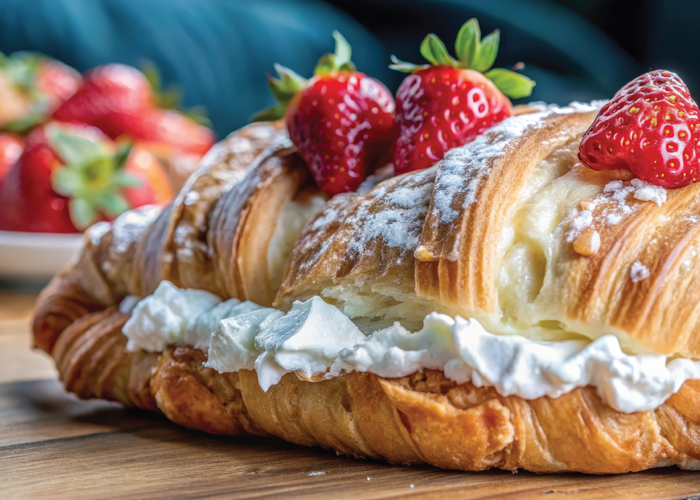
Filled Croissants with Whipped Cream
Ingredients:
• 4 store-bought croissants
• 200 ml heavy cream (at least 30% fat)
• 2 tbsp sugar
• 1 tsp vanilla sugar or vanilla extract
• Fresh berries (such as strawberries, blueberries, or raspberries) for garnish
• Powdered sugar (optional)
Instructions:
Instructions:
1. Prepare the Whipped Cream:
◦ Pour the heavy cream into a bowl and add the sugar and vanilla sugar (or vanilla extract).
◦ Stir until the sugar is completely dissolved.
◦ Pour the mixture into a siphon bottle and seal it.
◦ Charge the bottle with a nitrous oxide cartridge.
◦ Shake the bottle for about 10-15 seconds until the mixture becomes fluffy and light.
2. Prepare the Croissants:
◦ Gently cut each croissant in half.
◦ If desired, warm them lightly in the oven to make them fresh and soft.
3. Fill the Croissants:
◦ Fill each croissant gently with the whipped cream using the siphon bottle. The cream is light and airy, making it easy
and clean to fill the croissants.
4. Serve and Garnish:
◦ Place the filled croissants on a plate and garnish with fresh berries (such as strawberries, raspberries, or blueberries).
◦ Optionally, dust with a little powdered sugar for a finishing touch.
Tip:
• For even more flavor, you can add a small amount of liqueur (like Cointreau or Amaretto) to the whipped cream to give it extra depth.
• Garnish the filled croissants with chocolate shavings or crushed nuts for added texture and flavor.
These filled croissants are perfect for a delicious breakfast or dessert, with
light, fluffy whipped cream and fresh fruit making them irresistibly tasty!
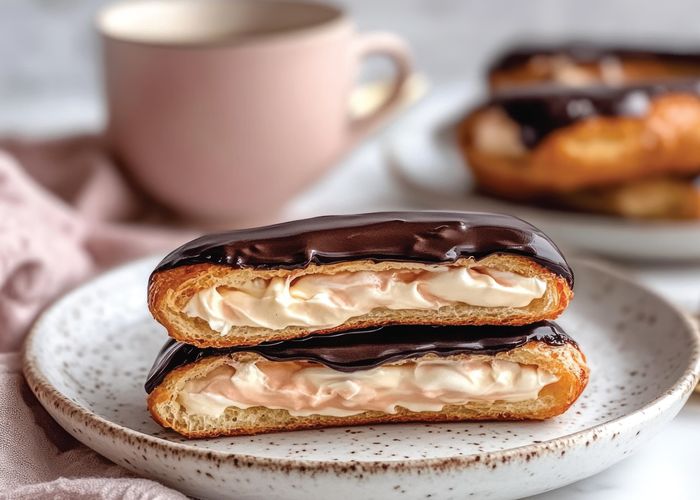
Éclairs with Coffee Cream
Ingredients:
For the Éclair Pastry:
• 100 g butter
• 250 ml water
• 1/2 tsp salt
• 150 g flour
• 4 large eggs
For the Coffee Cream:
• 250 ml heavy cream
• 2 tsp instant coffee powder
• 1 tbsp sugar (optional, depending on sweetness preference)
• 1/2 tsp vanilla sugar
For the Chocolate Glaze (for decoration):
• 100 g dark chocolate
• 1 tbsp heavy cream
Instructions:
1. Making the Éclair Pastry:
◦ Preheat the oven to 200°C (180°C with fan).
◦ In a small pot, combine water, salt, and butter. Heat over medium heat until the butter melts and the mixture comes to a boil.
◦ Add the flour all at once and stir continuously until the dough forms a ball and pulls away from the sides of the pot. Cook for about 1 minute.
◦ Remove the pot from heat and let the dough cool for a couple of minutes.
◦ Add the eggs one at a time, mixing well after each addition until the dough is smooth and elastic.
◦ Transfer the dough to a piping bag or a plastic bag with the tip cut off. Pipe the dough into lines about 5 cm long onto a baking sheet lined with parchment paper.
◦ Bake the éclairs for 20-25 minutes, until golden and puffed. Do not open the oven door for the first 10 minutes to prevent them from collapsing.
◦ Let the éclairs cool in the oven with the door slightly ajar.
2. Making the Coffee Cream:
◦ Heat the heavy cream in a small pot over low heat, and add the coffee powder and sugar. Stir until the coffee dissolves completely.
◦ Let the mixture cool to room temperature.
◦ Pour the cooled mixture into a siphon bottle, add the vanilla sugar, and seal the bottle.
◦ Charge the siphon with a nitrous oxide cartridge and shake well.
◦ Place the siphon in the fridge for at least 30 minutes to chill.
3. Making the Chocolate Glaze:
◦ Melt the chocolate with the cream over low heat or in a
water bath.
◦ Stir until smooth and let it cool slightly.
4. Filling and Decorating the Éclairs:
◦ Once the éclairs are cool, make a small incision at the top of each éclair to create a hole for filling.
◦ Dispense the coffee cream from the siphon and fill the éclairs with the light, airy coffee cream.
◦ Dip the tops of the éclairs into the melted chocolate glaze and let it set before serving. Serve immediately or store in the fridge until ready to serve.
Tips:
• Baking the Éclairs: If the éclairs do not rise properly, it could be due to the oven being too cold or opening the oven door too soon.
It’s essential that the dough does not come into contact with cold air.
• Coffee Cream: Using nitrous oxide in the siphon gives the coffee cream a light, airy texture, making it very soft and fluffy. Avoid
adding too much sugar, as the coffee itself provides a balanced bitter flavor that pairs well with sweetness.
These éclairs make for a perfect dessert—crisp, buttery pastry filled with
rich, velvety coffee cream, topped with glossy chocolate. Enjoy!
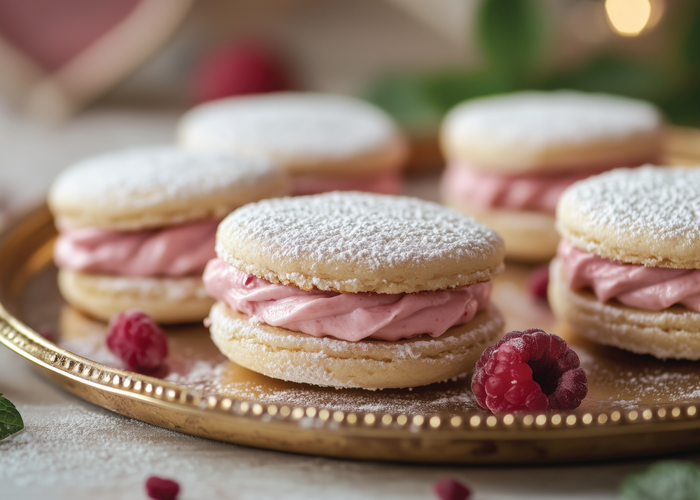
Filled Cookies with Raspberry Cream
Ingredients:
For the Cookie Dough:
• 200 g flour
• 100 g sugar
• 100 g butter
• 1 egg
• 1 tsp vanilla sugar
• 1/2 tsp baking powder
• 1 tsp milk (or water, to make the dough soft)
For the Raspberry Cream:
• 250 ml heavy cream
• 150 g raspberry puree (or fresh raspberries, pureed)
• 2 tbsp sugar (or to taste)
• 1/2 tsp vanilla sugar
For Decoration:
• Powdered sugar
• Fresh raspberries (optional)
Instructions:
1. Making the Cookie Dough:
◦ Preheat the oven to 180°C (160°C with fan).
◦ In a large bowl, mix together flour, sugar, baking powder, and vanilla sugar.
◦ Add the softened butter and mix until the mixture resembles crumbs.
◦ Add the egg and milk, then mix the dough until smooth and elastic. If the dough is too dry, add a little more milk.
◦ Chill the dough in the fridge for about 30 minutes (this helps the cookies hold their shape during baking).
◦ Once chilled, roll the dough out on a floured surface to a thickness of about 3 mm.
◦ Use cookie cutters (round or heart-shaped) to cut out the cookie bases.
◦ Place the cookies on a baking sheet lined with parchment paper and bake for 10-12 minutes or until golden.
◦ Let the cookies cool completely.
2. Making the Raspberry Cream:
◦ If using fresh raspberries, puree them in a blender or with an immersion blender. If using store-bought raspberry puree, you can skip this step.
◦ Heat the heavy cream in a medium pot over low heat and add the sugar. Heat until the sugar dissolves and the cream starts to simmer lightly.
◦ Remove from heat and add the raspberry puree. Stir well to combine.
◦ Pour the mixture into a siphon bottle, add the vanilla sugar, and close the bottle.
◦ Charge the siphon with a nitrous oxide cartridge and shake well.
◦ Place the siphon in the fridge for at least 30 minutes so the cream can chill and be ready for filling.
3. Filling and Decorating the Cookies:
◦ Once the cookies have cooled, place a generous amount of raspberry cream on one cookie.
◦ Top it with another cookie to form a sandwich.
◦ Decorate the cookies with powdered sugar and top with fresh raspberries, if desired.
Tips:
• Dough: Avoid overmixing or overworking the dough as this can make the cookies tough. Gently mix until the dough comes together.
• Raspberry Cream: The raspberry cream made with nitrous oxide is light and airy. If you want the cream to be sweeter, adjust the
sugar to your taste. If the raspberry puree is too tart, the sugar will balance the flavors.
• Storage: Filled cookies are best served immediately, but if left for a few hours, they will maintain their flavor and texture well.
These raspberry cream-filled cookies make for a delightful, fruity treat
that’s perfect for any occasion!
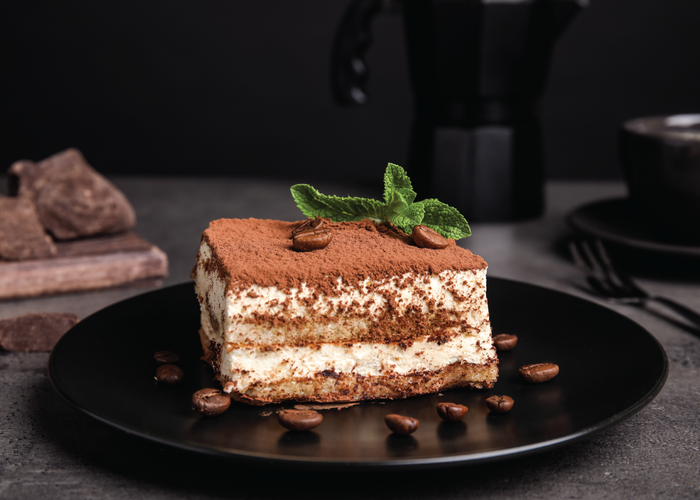
Tiramisu Cake
Ingredients:
For the Cake Base (Sponge):
• 4 eggs
• 100 g sugar
• 100 g flour
• 1 tsp vanilla sugar
• 1/2 tsp baking powder
• 50 g melted butter
For the Tiramisu Filling:
• 500 g mascarpone cheese
• 200 ml heavy cream
• 2 tbsp sugar (optional, depending on your desired sweetness)
• 2 tsp vanilla sugar
• 2 tsp coffee powder
For the Coffee and Liqueur Mixture:
• 200 ml strong coffee (preferably black, without sugar)
• 50 ml liqueur (e.g., Amaretto or Kahlúa, if preferred)
• 2 tbsp sugar (optional, if you want a sweeter coffee mixture)
For Decoration:
• Cocoa powder (for dusting)
• Chocolate shavings or chunks (optional)
Instructions:
1. Baking the Cake Base:
◦ Preheat the oven to 180°C (160°C with fan).
◦ Separate the eggs and beat the egg whites with the sugar
until fluffy and stiff peaks form.
◦ In another bowl, whisk together the egg yolks, melted butter, and vanilla sugar.
◦ Sift the flour and baking powder together, then add the dry ingredients to the egg mixture. Mix gently to keep the batter airy.
◦ Carefully fold in the beaten egg whites.
◦ Pour the batter into a 20 cm round cake pan lined with parchment paper and bake for 20-25 minutes or until golden and a toothpick comes out clean.
◦ Allow the cake to cool completely.
2. Preparing the Tiramisu Filling:
◦ Whip the heavy cream with sugar and vanilla sugar until
stiff peaks form.
◦ Mix the mascarpone cheese until smooth and creamy. Add the coffee powder and mix well.
◦ Pour the mascarpone mixture into a siphon bottle and add the sugar, stirring to combine.
◦ Seal the bottle and charge it with a nitrous oxide cartridge. Shake well and refrigerate for at least 30 minutes.
◦ Once the filling is light and chilled, it’s ready to fill the cake.
3. Preparing the Coffee and Liqueur Mixture:
◦ Brew 200 ml of strong coffee and let it cool slightly.
◦ Mix the coffee with the liqueur and sugar until the sugar dissolves.
4. Assembling the Cake:
◦ Slice the cooled cake into 2-3 layers.
◦ Place the first layer of cake in a serving dish or cake pan. Brush it with part of the coffee and liqueur mixture, soaking it lightly but not overly wet.
◦ Spread a layer of tiramisu filling on top, using the whipped mascarpone-coffee cream from the siphon.
◦ Repeat layering the cake, coffee mixture, and tiramisu
filling until all ingredients are used.
◦ Finish the cake with a final layer of the tiramisu filling and dust with cocoa powder. Optionally, decorate with chocolate shavings.
5. Chill and Serve:
◦ Place the cake in the refrigerator for at least 2-3 hours (overnight is ideal) to allow the flavors to meld and the cake to fully chill with the filling.
◦ Before serving, dust with more cocoa powder and garnish with chocolate shavings if desired.
Tips:
• Cake Base: For an extra festive touch, you can make the cake in multiple layers, adding chopped chocolate between layers if you
like a bit of extra sweetness.
• Filling with Nitrous Oxide: Using nitrous oxide makes the tiramisu filling incredibly light and airy, adding a luxurious texture
to the cake. Be sure to keep the filling chilled to maintain its fluffy
consistency.
• Coffee: If you want an alcohol-free version, simply omit the liqueur and use only the coffee mixture.
This tiramisu cake is an indulgent and elegant dessert, perfect for any
special occasion!
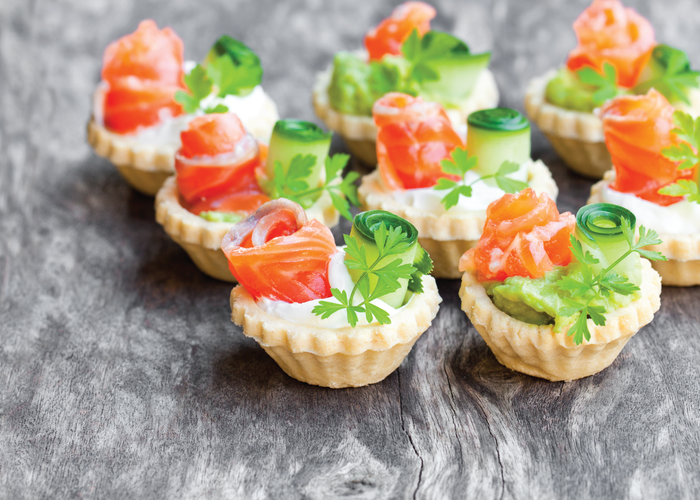
Savory Tartlets with Smoked Salmon and Avocado Filling
Ingredients:
For the Tartlet Dough:
• 200 g flour
• 100 g cold butter
• 1 egg
• 1/2 tsp salt
• 2-3 tbsp cold water
For the Filling:
• 200 g smoked salmon (preferably flavored smoked)
• 1 ripe avocado
• 100 ml heavy cream
• 1 tsp lemon juice
• 1 tsp Dijon mustard
• 1/2 tsp salt
• 1/4 tsp white pepper
For Garnish:
• Finely chopped dill
• Lemon wedges
• Smoked salmon strips or slices
• Dill sprigs
Instructions:
1. Making the Tartlet Dough:
◦ Preheat the oven to 180°C (160°C with fan).
◦ In a large bowl, mix flour and salt. Add cold butter and cut it into small pieces. Use your fingers or a mixer to create a crumbly texture.
◦ Add the egg and mix quickly. If the dough is too dry, add cold water to bring it together. Be careful not to overwork the dough, as it could become tough.
◦ Wrap the dough in plastic wrap and refrigerate for at least 30 minutes.
◦ Once the dough is chilled, roll it out thinly and line tartlet pans with it. Bake for 10-15 minutes, or until the dough is golden and crisp.
◦ Let the tartlet shells cool.
2. Making the Filling:
◦ Cut the smoked salmon into small pieces.
◦ Peel and chop the avocado, then mash it with a fork to
create a creamy texture.
◦ Add lemon juice, mustard, salt, and pepper to the mashed avocado and mix until smooth.
◦ In a separate bowl, whip the heavy cream until soft peaks form.
◦ Pour the whipped cream into a siphon bottle, add the
smoked salmon and avocado mixture, and seal the bottle.
◦ Charge the siphon with a gas cartridge, shake well, and refrigerate for at least 30 minutes.
3. Filling the Tartlets:
◦ Once the dough is cooled and the filling is ready, spoon a small amount of the smoked salmon and avocado mixture into each tartlet shell.
◦ Using the whipped cream from the siphon, top each tartlet with a light and fluffy layer of the smoked salmon and avocado mousse.
◦ Garnish with fresh dill, a few drops of lemon juice, and a slice of smoked salmon.
Tips:
• Dough: To avoid the dough becoming too tough, don’t overwork it. Cold butter and water are key to keeping the dough tender and
crisp.
• Filling: The whipped filling with nitrous oxide is light and airy, complementing the delicate and crispy tartlet shell perfectly. If the filling is too thick, add a little more cream or lemon juice to balance it out.
• Avocado: Choose a perfectly ripe avocado that is soft yet firm. If it’s too overripe, it can affect the consistency of the filling.
These savory tartlets are perfect as appetizers or for a special occasion, offering a creamy and fresh flavor combination with a crisp, buttery shell. Enjoy!
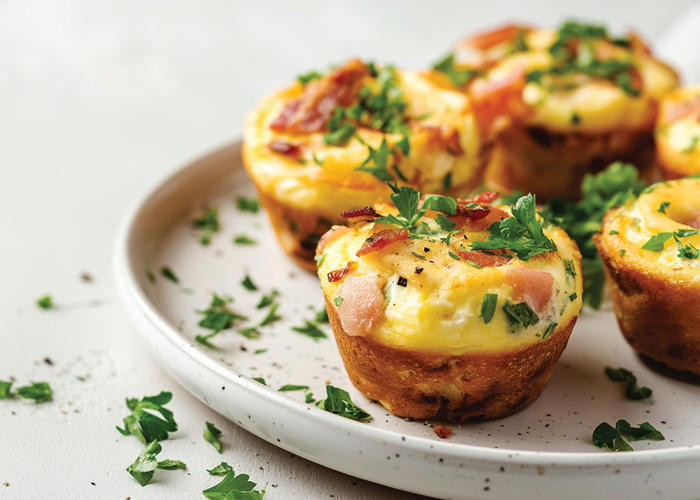
luffy Mini Quiches with Bacon, Cheese, and Onion
Ingredients:
For the Mini Quiche Dough:
• 200 g flour
• 100 g cold butter
• 1 egg
• 1/2 tsp salt
• 2-3 tbsp cold water
For the Filling:
• 100 g bacon (chopped)
• 1 small onion (finely chopped)
• 100 g grated cheese (such as cheddar, gouda, or parmesan)
• 150 ml cream
• 2 eggs
• 1/2 tsp black pepper
• 1/4 tsp salt
• 1/4 tsp ground nutmeg
For Garnish:
• Fresh parsley (optional)
• Small chunks of cheese or grated cheese
Instructions:
1. Making the Mini Quiche Dough:
◦ Preheat the oven to 180°C (160°C with fan).
◦ In a bowl, mix flour and salt. Add the cold butter and cut it into small pieces. Use your fingers or a mixer to form a crumbly texture.
◦ Add the egg and mix quickly. If the dough is too dry, add cold water until it comes together. Be careful not to overwork the dough, as it will become tough.
◦ Wrap the dough in plastic wrap and refrigerate for at least 30 minutes.
◦ Once chilled, roll the dough out thinly and line mini quiche pans or muffin tins with it. Bake for 10-12 minutes, or until the dough is golden and crisp.
◦ Let the dough cool.
2. Preparing the Filling:
◦ Fry the chopped bacon in a pan over medium heat until
crispy and golden. Remove from the pan and set aside.
◦ In the same pan, sauté the chopped onion until soft and translucent (about 5 minutes).
◦ In a bowl, whisk together eggs, cream, salt, pepper, and nutmeg until smooth.
◦ Stir in the grated cheese.
◦ Pour the mixture into a siphon bottle, seal, and charge it with a gas cartridge. Shake well and refrigerate for at least
30 minutes to make the filling light and airy.
3. Filling the Mini Quiches:
◦ Once the dough has cooled and the filling is ready, fill each mini quiche shell with a little bacon and sautéed onion.
◦ Pour the airy filling from the siphon into each quiche shell. This will give the quiches a luxurious, light texture.
◦ Bake the mini quiches in the oven for 15-20 minutes, or until the filling is set and golden brown.
4. Serve:
◦ Once the quiches are baked, let them cool slightly.
◦ Garnish with fresh parsley and, if desired, a sprinkle of
grated cheese.
◦ Serve warm or at room temperature.
Tips:
• Dough: If the dough becomes too tough, add a bit more cold water to achieve a soft and elastic texture. The dough should not be too
dry to ensure it stays crisp when baked.
• Filling: The gas-charged filling is lighter and fluffier, perfectly complementing the crispy crust. If the filling is too thick, add more cream or milk to achieve a smoother texture.
• Cheese: Feel free to use your favorite cheese to make the filling even more flavorful. Stronger cheeses, like parmesan or roquefort,
can give the quiches a more intense taste. These fluffy, savory mini quiches make for a perfect appetizer or snack for any gathering. Enjoy their deliciously creamy filling and crisp shell!